WooCommerce Price Note Plugin WooCommerce Price Note Plugin
WooCommerce Price Note PluginWooCommerce Price Note Plugin
WooCommerce Price Note Plugin
Overview
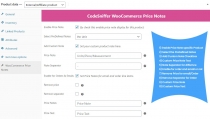
WooCommerce Price Note Plugin offers Shop-Manager/Owner to show/set their product prices notes, change notes colors or add new Notes for all Shop, Category page, Product single page, Mini Cart and Checkout page. Not this only With WooCommerce you can also set Notes for order email to customers. Enable product custom notes via Product level.
Features
· Enable Price note for Category Page
· Enable Price note for Mini Cart
· Enable Price note for Archive Page
· Enable Price note for Single Product pages
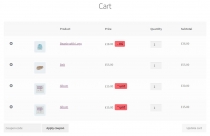
· You can also enable Price Notes for Cart, Check Pages
· Admin also see the order Product in which measurement note
· Customer Receive the price notes for their ordered product via order email
· Pre-defined price notes with measurements
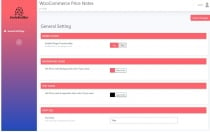
· Changing color for all price notes background and text color
· Font size change for all pages
· Custom Price note and Measurement are added
Requirements
You must have latest WordPress & WooCommerce Installation already done on your website.
Instructions
Before we start with the process of installing Plugin, make sure you have downloaded the plugin itself whether from codester.com or from https://www.codester.com
Now when you have it downloaded on your computer you may start installation process. There are two ways for doing that: from WordPress admin panel and via FTP.
Let's see how it goes the easy way - from WordPress admin panel.
1. Install Plugin using WordPress admin panel
On your side menu, place your cursor on Plugins and then click on Add New.
On the Add Plugins page select Upload Plugin
Now select Choose File and browse to plugin.zip file on your computer, then click Open.
When done, hit Install Now button and the installation procedure will start. Wait until it is done and then click Activate Plugin, as in the picture below.
2. Install Plugin Using FTP Manager
This method is not very user friendly (although it is not at all complicated as it may seem at the beginning) but it offers complete overview of the stuff happening "behind the scene".
For this method, you will need an FTP manager such as FileZilla -All Platform, FireFTP -All Platform, Cyber duck -Mac Only, Winesap -Windows Only, or any other for that matter.
With this installation method you will notice the difference in the very beginning as you will need to unpack downloaded plugin.zip on your hard drive. When finished unpacking, you will end up with a folder named "plugin".
Now, head to your FTP client of choice and connect to your FTP account. Usually, FTP managers have two "sides" where the one is your local drive and the other is your server. Browse to your WordPress installation folder on the server and head to wp-content/plugins folder. Next, browse to the plugin folder on your hard drive, select the whole folder and drag&drop it to wp-content/plugins folder on your server.
Wait until upload process finishes. Then log in to your WordPress admin panel and head to Plugins. Your Plugin should be now listed with all of the other plugins (if not, you probably have uploaded it to the wrong folder). Now, go ahead and click Activate.
Other items by this author
| Category | Plugins / WooCommerce |
| First release | 19 March 2020 |
| Last update | 19 March 2020 |
| Supported CMS | WordPress 4.4, WordPress 4.3, WordPress 4.2, , WordPress 4.0, , , WooCommerce 2.5.x, WooCommerce 2.6.x, WordPress 4.5, WordPress 4.6, WordPress 4.7, WooCommerce 2.7.x, WooCommerce 3.0.x, WooCommerce 2.8.x, WooCommerce 2.9.x, WordPress 4.8, WordPress 4.9, WordPress 5.0 |
| Files included | .php, .css, .html, .less, .sql, Layered .psd, Layered .png, Javascript .js |
| Tags | plugin |


