Event Scheduling with Calendar PHP ScriptEvent Scheduling with Calendar PHP Script
Add your own events with customize time slots and sync with google calendar simulteanously.Event Scheduling with Calendar PHP Script
Add your own events with customize time slots and sync with google calendar simulteanously.
Overview
Presenting Event Scheduling with Calendar script. Simply Unzip the files and start using it. You can create new events, delete the events in the form of cards.
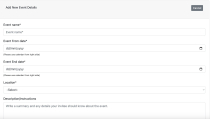
- Create the new event with your date availability and set the time for each day.
- Sync with google calendar with one single click.
- Listing of bookings done by the users.
- The whole script is Responsive, so it will work on desktop and mobile as well.
- Full support is available 24x7
Features
Below are the main features of EventScheduling Software: -
ADMIN PANEL
- Responsive design with bootstrap structure
- Unlimited Creation of New Event Cards for each user.
- Event cards will display in a separate listing page for each user.
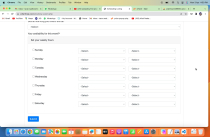
- Different time slots for each day and for each event.
- Syncing with google calendar during creation of new event in one single
- Delete the event cards and create new one as per your requirements.
- Copy the URL and paste it on your browser tab for open it on front end.
- A smart popup showing the full URL of the card for sharing with your upcoming clients.
- Example of cards you can create e.g. property listing, plumber meeting etc.
FRONT END
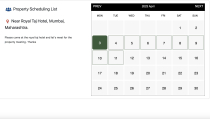
- A responsive calendar showing the selected dates of your created event.
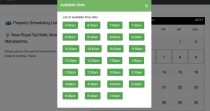
- Each date of the event showing the available time slots what you added in admin panel during creation of an event.
- Clients can book the time slot by entering their basic details like Name, Email and Phone number.
Requirements
PHP 7.0, PHP MY ADMIN, Wamp server (In case of localhost)
Instructions
Installation Instructions
Please follow the below steps carefully to complete the installation process.
- The first thing you need to do after downloading the event-scheduling zip file from Codester is extracting the file. Let’s assume you have successfully extracted the downloaded file.
- You will get two folders inside it. One is the “Documentation” folder and other is the “EventScheduling” Folder
- You can upload anywhere inside your public_html directory or any sub- folder if you want.
- After uploading the EventScheduling Folder, the first thing you need to go into “Classes Folder” and find the DBConfig.php file. Open DBConfig.php file and change the value for following variables: - Host Name = “localhost” Username = “root” Password = “your server db password” Database name = “calendar_event”
- Once the above step has been done, find the “Config” folder. Inside this folder, open the config.ini file and change the value for following variables: - HOST_URL = “Your domain URL” ADMIN_EMAIL = “Your administrator email or owner email” FROM_EMAIL = “Your server from email address”
- In this step, please find the “calendar_event.sql” database file and import this file into your phpMyAdmin.
- In Config Folder/config.ini, simply add your google Client ID, secret ID and Redirect URL, it will start syncing with google calendar.
Other items by this author
| Category | Scripts & Code / PHP Scripts / Miscellaneous |
| First release | 6 April 2023 |
| Last update | 25 April 2023 |
| Files included | .php, .css, .html, .sql, Javascript .js |
| Tags | Calendar, events, cards, google calendar |


