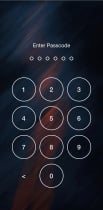
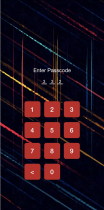
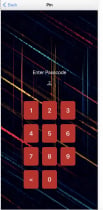
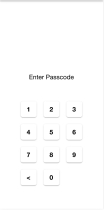
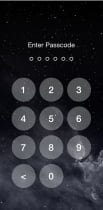
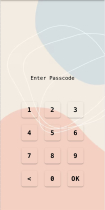
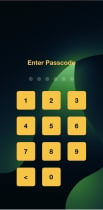
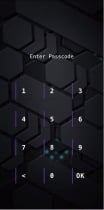
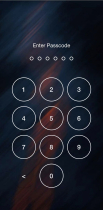
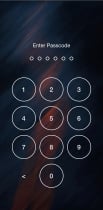
Ionic Lock Screen TemplatesIonic Lock Screen Templates
Enhance app security with elegant, customizable, easy-to-integrate pin-based lock screens for Ionic 7Ionic Lock Screen Templates
Enhance app security with elegant, customizable, easy-to-integrate pin-based lock screens for Ion...
Overview
Revolutionize Your App with Our Ionic Lock Screen Templates
Introducing a range of versatile and elegant Ionic Lock Screen Templates designed to enhance user experience and app security. Perfect for developers looking to integrate seamless, stylish, and secure lock screens into their mobile applications.
- Seamless Integration: Easy to integrate into any Ionic project.
- User-Friendly Designs: Enhance your app with our aesthetically pleasing themes.
- Highly Customizable: Tailor the themes to fit your app's unique style.
- Robust Security: Offer users reliable and secure authentication.
- Responsive Layouts: Perfectly adaptable to various device sizes.
Embrace the future of mobile app design with our Ionic Lock Screen Templates. Elevate your app's interface and user experience today!
Features
- Customization: The template's organized structure allows for easy modification and expansion. Styles and logic of each theme are self-contained for hassle-free customization.
- Project Structure: Adheres to Ionic's best practices in file organization, promoting a clear division of responsibilities that simplifies resource management.
- NgModule: Adopts a modular architecture with each theme encapsulated in its own NgModule, enabling component, service, and directive lazy loading for optimized performance.
- Responsiveness: Crafted to be fully responsive, ensuring the lock screen adapts elegantly across devices, from smartphones to tablets.
- Ionic Routing: Leverages Angular's robust routing system to facilitate seamless navigation among various lock screen themes.
Requirements
- Node.js: A compatible version of Node.js is essential. For Ionic 7, it is recommended to use the latest Node.js LTS (Long Term Support) version to ensure stability and compatibility.
- NPM (Node Package Manager): Comes with Node.js and is used for managing dependencies. Ensure that it is up to date to avoid any potential conflicts with package installations. More details on npm here.
- Ionic CLI: The Ionic Command Line Interface (CLI) tool must be installed globally. This can be achieved through the Node.js package manager with the command
npm install -g @ionic/cli. More details on ionic installation here. - Angular CLI: To manage Angular-specific elements within the project, install the Angular CLI via npm with
npm install -g @angular/cli. - Environment Setup: Configure your development environment to support TypeScript, Sass for styling, and the latest web technologies that Ionic 7 depends upon.
- Code Editor: A modern code editor like Visual Studio Code, which supports Ionic and Angular development through extensions and built-in features, is recommended.
- Git: Version control with Git is advisable for managing changes and collaborating if you are working within a team.
- Latest Web Browser: A recent version of a web browser (Chrome, Firefox, Safari) for testing and debugging.
Instructions
Follow these steps to set up and install the Ionic Lock Screen template in your development environment:
- Install Node.js and npm: Download and install Node.js from the [official website]. npm is included with Node.js.
- Visit the official Node.js website.
- Choose the Long Term Support (LTS) version for stability.
- Download the installer for your operating system.
- Run the downloaded installer, following the prompts to install Node.js and npm.
- Open a terminal or command prompt.
- Confirm the installation by running below, which should display the installed versions. node -v and npm -v
- Install Ionic CLI: The Ionic Command Line Interface (CLI) is crucial for building and managing Ionic applications. To install the Ionic CLI, follow these detailed steps:
- Check that Node.js and npm are installed. If not, download them from the official Node.js website.
- Open your terminal or command prompt.
- Install the Ionic CLI globally with the following command, which will make it accessible from any location on your system:npm install -g @ionic/cli
- Be patient as the installation completes, which might take a few minutes based on your internet speed.
- To confirm the installation, type
ionic -vin your terminal, which will display the version of the Ionic CLI that has been installed. For more information on Ionic CLI, visit the Ionic documentation.
- Install Angular CLI: To work with Angular projects, installing the Angular CLI is necessary. Follow these steps to install it:
- Confirm that Node.js and npm are set up on your machine. If you need to install them, visit the official Node.js website.
- Open a command line interface such as Terminal on macOS or Command Prompt on Windows.
- Type the following command to install the Angular CLI globally, giving you access to it from any project directory:npm install -g @angular/cli
- Once the installation finishes, verify it by entering
ng versionin the command line. This will display the version number of the Angular CLI installed.
- Navigate to the Template Directory: To start working with the Ionic Lock Screen template, you need to navigate to its directory called "pin-screen" in your system. Follow these steps:
- Open a terminal or command prompt on your computer.
- Use the 'cd' (change directory) command followed by the path to the template's root directory. For example, if your template is located in 'Documents', the command would be:cd path/to/template/folder/pin-screen
- Ensure you're in the correct directory by typing
pwd(print working directory) which will display your current directory path.
- Install Template Dependencies: To ensure your Ionic Lock Screen template functions correctly, it's essential to install its dependencies. Here's how to do it:
- After navigating to the template's root directory in the terminal or command prompt, ensure you're in the correct directory where the 'package.json' file is located.
- Run the commandnpm install to begin the installation of dependencies. This process may take a few minutes, depending on your internet connection.
- Upon completion, a 'node_modules' folder will be created in your directory, containing all the installed packages.
- Run the Application: To view and interact with the Ionic Lock Screen template in a browser, follow these steps:
- Ensure that you are still in the template's root directory in your terminal or command prompt.
- Type the commandionic serve and press Enter. This command starts a local development server and opens the template in your default web browser.
- Build the Application for Production: Compiling the application for deployment in both web and native mobile platforms is a crucial step. Here's how to do it:
- For web deployment, runionic build --prod in the terminal. This will optimize the app for production and generate files in a 'www' or 'dist' directory.
- To build for iOS, first ensure you have Xcode installed, then runionic build ios . You might need to open the generated project in Xcode to sign and manage provisioning profiles.
- For Android, ensure you have Android Studio installed, then runionic build android . Open the generated project in Android Studio to build and test on emulators or real devices.
- Remember, building for iOS and Android requires specific setup for each platform, including SDKs and environment configurations.
Other items by this author
| Category | App Templates / Ionic / Themes |
| First release | 18 January 2024 |
| Last update | 18 January 2024 |
| Operating Systems | iOS 14.0, iOS 15.0, Android 11.0, Android 12.0 |
| Files included | .html, Javascript .js |
| Tags | ionic, lock screen, pin screen, ionic lock, numeric lock, lock theme, pin theme |


