Overview
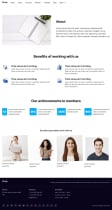
A beautiful modern WordPress theme in light colors, based on the Elementor plugin, which makes it easy to use. Pages are built by dragging ready-made blocks from the Anyshop theme into the Elementor editor.
Ready-made blocks from the Anyshop theme are already adapted for mobile devices.
Colors, images, typography change, and animation is set for block elements.
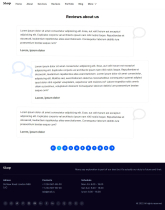
Add an endless supply of services, portfolio work, blog posts, and testimonials.
The archive contains a video instruction for the most visual and understandable use.
SEO is configured through the Yoast SEO plugin.
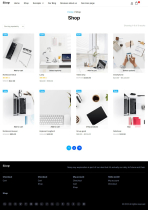
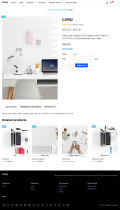
The theme allows you to create a landing page, a multi-page information site, a blog, a store.
Find and download free icons and images for the site here:
Features
Beautiful, light, modern, responsive, simple, professional, with animated effects, customizable
Requirements
CMS WordPress
Instructions
THEME LOADING
In the WordPress admin panel, on the “Appearance” tab, in the “Themes” sub-item, click on the “Add” button, click on the “Upload theme” button, drag the archive with the anyshop.zip theme, click on “Install”.
When the theme is loaded, a message will appear saying that the installation was successful. Click on the "Activate" link.
After clicking on the “Activate” link, a message will appear about the required plugins for the activated theme. Click on the link “Start Installing Plugins”.
Select all plugins. Next to the “Apply” button, select the “Install” action. Click "Apply". If a plugin has not been checked and installed, you can install the remaining plugins in the “Appearance” tab in the “Installing plugins” item.
When the plugins are installed, click on the "Return to console" link.
Go to the Elementor tab of your WordPress admin panel. In the general settings, check the “Portfolio” and “Services” checkbox so that you can edit portfolio work pages and service pages through Elementor. Save your changes.
MENU IN HEADER
Set up the correct menu display.
On the “Appearance” tab of the WordPress admin panel, in the “Menu” item, create a menu for the site header. Enter the name of the menu. Select the header menu display area. Click the "Create Menu" button.
Add menu items from the column on the left.
MENU IN FOOTER
In the footer of the site, a separate menu is created for each of the columns. An arbitrary link with “#” in the URL is added as a column heading.
On the “Appearance” tab of the WordPress admin panel, in the “Menu” item, create a menu for the footer of the site. Enter the name of the menu. Select the “Footer Menu” display area. Click the "Create Menu" button.
Add menu items from the column on the left in the same way as in the menu in the site header. Save the menu.
HOME PAGE OF THE SITE
On the Pages tab of your WordPress admin panel, click the Add New button. Write the title "Home". Click publish 2 times. Go back to the WordPress admin panel by clicking on the square “W” icon on the black background. In the “Settings” tab of the admin panel, in the “Reading” item opposite “Display on the main page”, select “Static page”, select the name of the main page below (see figure Setting the main page). Save your changes. Now the master page you created earlier will be displayed when you open the site.
Go to the “Pages” tab of the WordPress admin panel, select the master page you created earlier. Then click the "Edit in Elementor" button.
In the Elementor editor, click on the plus icon to add a section. Select the first structure: full width.
Section added. On the "Layout" tab, select "Layout Width" - "Full Width", "Column Padding" - "No Padding". Then go to the widget menu by clicking on the icon with nine dots.
Scroll down the list of widgets to a tab called "Anyshop Theme". Select a widget, click and drag to the added section.
If several widgets are used one after another in one section, then set a limited layout width of 1110. On the “Advanced” tab, set “Indent inside” to the left and right by 15 so that the texts do not stick to the edges of the browser, top and bottom - in their own way discretion.
Create other pages in the same way. Portfolio and services pages are also created.
PORTFOLIO
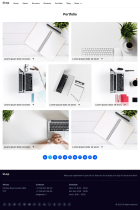
On the Pages tab of your WordPress admin panel, select Add New. Enter the title "Portfolio". In the right column under "Templates" select "Portfolio Page". Click "Publish" 2 times. This page will automatically display all the works added to the portfolio.
To add work to your portfolio, on the Portfolio tab of your WordPress admin panel, select Add New.
Enter a title for the job. In the right column, be sure to set the image of the entry, “Excerpt” indicate a brief description of the work. Click "Publish" 2 times.
Click on the “Edit in Elementor” button. If there is no such button, return to the WordPress admin panel, select the Elementor tab. Check the box next to Portfolio. Save the changes (see the Elementor figure).
Create a portfolio work page in the Elementor editor by creating full-width sections and dragging widgets from the Anyshop Theme tab into them, just like when creating the main page.
BLOG
First, create a blog page and add it to the menu.
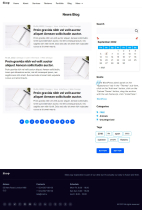
On the Pages tab of your WordPress admin panel, select Add New. Enter a title, for example, "Blog". In the right column under the "Templates" tab, select "Blog Page". Click the "Publish" button 2 times.
Next, set up the display of the sidebar on the blog page.
Return to the WordPress admin panel, select the “Appearance” tab, the “Widgets” item. Fill with widgets “Sidebar on the right”.
Next, add blog posts. To do this, go to the “Posts” tab of the WordPress admin panel, select “Add New”.
Enter a title for the blog post. In the right column (opens by clicking on the gear), be sure to fill in the image of the entry. Edit content through the WordPress editor or through the Elementor editor. Click "Update" after each edit. Return to the WordPress admin panel, add posts in the same way.
Next, set up the display of information about the author of the post on the blog post page.
On the Users tab of the WordPress admin panel, select a user. Fill in the user's first and last name, as well as the "Biography" field - a small description of the author of the blog entries. Install the author's gravatar.
HEADER, FOOTER
In the Header, Footer tab, going through all the points, fill in the information. Save changes in each paragraph.
!!! Note!!! In the customizer editor, when changing colors, the selected styles can be visually reset on the customizer editor page, but if you click “Publish” and close the customizer, the selected colors will be saved and displayed on the website pages. Open the customizer again and continue editing.
Don't forget to click "Publish" after changes on each tab.
STORE
If you don't need the store, on the Plugins tab, deactivate the following plugins:
- Google Listings and Ads.
- WooCommerce.
- WooCommerce Shipping & Tax.
- WooCommerce Payments.
Other items by this author
| Category | Themes / WordPress / eCommerce |
| First release | 29 November 2022 |
| Last update | 6 March 2023 |
| Supported CMS | WordPress 5.0, WordPress 5.8, WordPress 5.9 |
| Files included | .php, .css, Javascript .js |
| Tags | template, wordpress, landing page, responsive, simple, web template, theme, woocommerce, light, multipurpose, wordpress theme, shop, store, customizable, blog, landing, beautiful, builder, multipage, elementor |


